# Introduction:
Hi, thanks for taking the time to read this blog post firstly. In this article (and perhaps series), I’m going to introduce some basics in web/app development and share some of my pitfalls and experiences along the way while I grappled with HTML5. So to begin with, a little about me…
 I’m Stephen (or Steve a.k.a. TheMonolith) and I’m a graduate architect from the School of Architecture in the University of Limerick (SAUL) but now working within the IT services industry. I graduated in May 2012 and I’ve always had a keen interest in making things, problem solving, understanding how things work and being a bit of a nerd. My programming and computer/technological skills are largely self-taught, some acquired in college and refined from years of tinkering and from the interwebz (sic) and from my day job. Monolithic Games is my own little design/development studio to keep me occupied in my spare-time, and I’ve been coding for about the last 18 months or so.
It wasn’t really until 3rd year (2008) that I really started using serious pieces of software for architecture work and projects, such as, CAD drawings, photomontages, 3D modelling and photo-realistic rendering. It helped that I made a beast of a home-built PC that was pretty capable CPU-wise, a dedicated graphics card and a pretty decent amount of RAM (now upgraded to 8GB). Fast forward a bit and I’m working in a technical support role in a call-center environment and being exposed to all sorts of crazy things that computers can do and how the internet works…it’s pretty amazing really. How it all – just – works.
The first programming language that I sat down to learn (from a …for Dummies book) was BASIC. As a first language it was fairly forgiving and wasn’t too head melty to try and get your head around.
PRINT stuff;
Makes sense right?
“Computer print ‘stuff’ on the screen”
“OK”
stuff
Next I tried Java, but man it’s tough going and very difficult, as a program will refuse to compile for a plethora of unknown reasons. I’ll be honest, I didn’t get very far, as I felt I needed to write my own example app/code, in order to actually understand what I was doing. Soon, I decided to just start with HTML, XHTML, CSS and Javascript. Eventually, I had an example game/webpage (or in actuality, a HTML file and some other files, that did stuff) to try and port to a Chrome extension but Chrome’s Content Security Policy hated the guts out of my gnarly, old-school code from circa 1995, and loads of parts were broken, especially HTML onclick events 🙁 The web version of my app is totally borked at the moment due to a similar affliction. After some confusion and late nights searching the interwebz for the meaning of ReferenceError, and undefined is null, and finally wrapping my head around event handlers, I finally had a HTML5 card game Chrome packaged app to display.
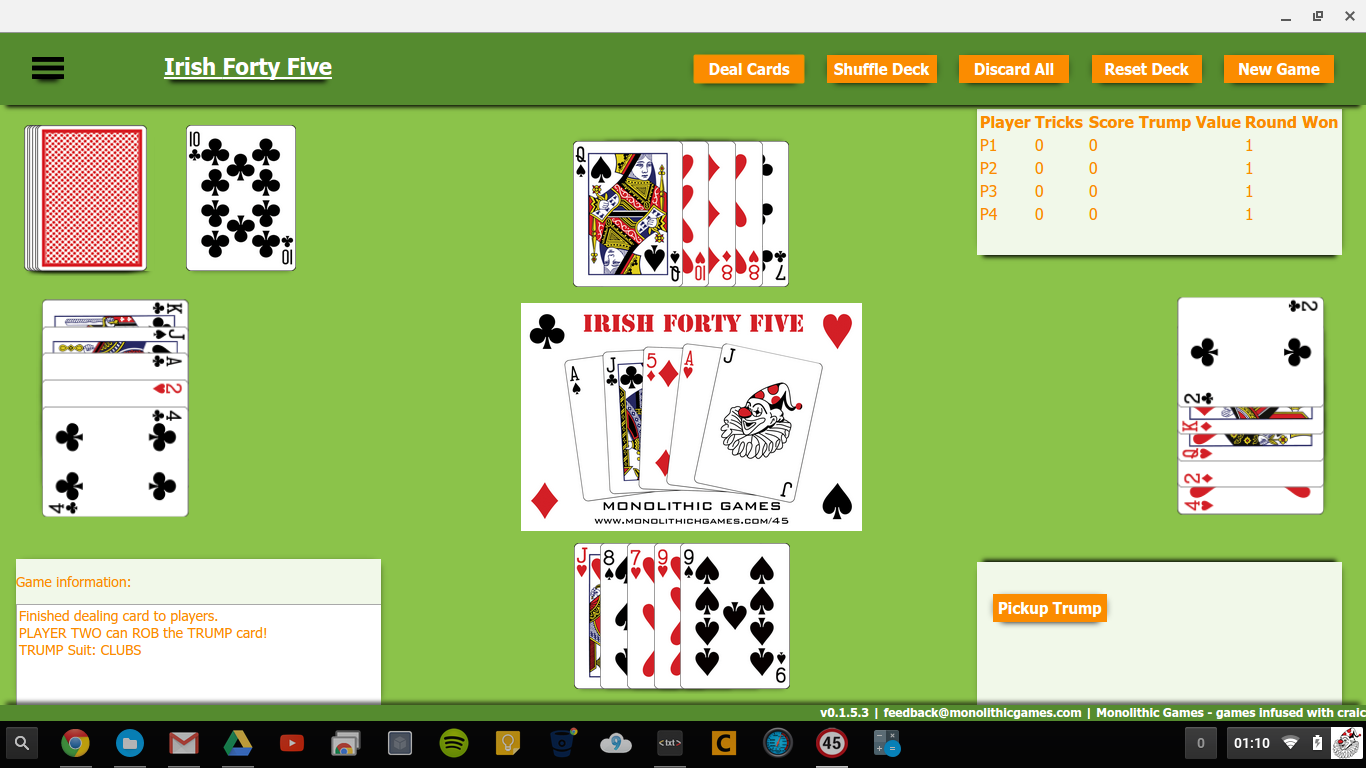
My first game, is called Irish Forty Five and it’s a HTML5 alpha card game app, based on the rules of 45, played in my area of Cork and throughout Ireland and further afield. It looks pretty (at least I think so) after a Material Design inspired makeover. I’m currently a bit stuck at the moment on the next iteration of game, so for now this is a working example, doesn’t have all of the rules implemented yet (follow suit, best trump, scoring, non-trump winning cards, AI etc). But, you can technically play a full game, with multiple rounds and win. I’m no coding expert and I don’t pretend to be so I hope you enjoy this starter to the HTML5 tutorial series. Feedback and comments welcome. Part 1 ==>
# Part 1 – v0.0
So, what is HTML and what does it do? HTML is, HyperText Markup Language and it’s a markup language used to create webpages and consists of HTML elements or tags, enclosed with angle brackets (e.g. <html>). Generally, these appear as opening and closing pairs, such as: <body></body> but also as empty or unpaired tags, such as <img>.
Let’s take a look at the structure of a basic HTML file, called index.html.
index.html – Example HTML file
<!DOCTYPE html>
<html>
<head>
<title>My first app</title>
</head>
<body>
<div>Hello, world!</div>
</body>
</html>
Simples, right? We can see that we define the following elements and I outline their meaning of function.
<!DOCTYPE html> – defines that the file is a HTML document
<html> – starting or opening <html> element tag
<head> – starting or opening <head> element tag
<title> – opening <title> tag element tag
My first app </title> – closing <title> element tag
</head> – closing <head> element tag
<body> – starting or opening <body> element tag
<div> Hello, world! – opening <div> element, containing text (i.e. Hello, world!)
</div> – closing <div> element tag
</body> – closing <body> element tag
</html> – closing <html> element tag
You can also see that there’s a sort of hierarchy or nested structure defines the file and where certain elements are expected. The above example is pretty much the most basic HTML file you can have. Let’s flesh this example out a bit and see if we can get the page to display or do something for us. I’ve uploaded some example sources files that you can download and open with your favourite text editor or pull into your development environment/IDE.
I’m going to start off with a very simple Chrome app and we’ll expand the functionality as we go, in order to learn some basic principles and try and make the journey a bit easier, and introduce CSS and Javascript as we go. I’ll also point out some pitfalls that I encountered and how I overcome them or worked around them. All examples code and milestones, as well as the source for some of my other projects can be found on GitHub.
# Part 2: v0.1 – First Chrome packaged app
What is a Chrome packaged app?? A packaged app for Chrome is an offline-enabled and web application that runs within Chrome browser, sandboxed in it’s own window and uses HTML, CSS and Javascript a.k.a. HTML5. As I got a Dell 11 Chromebook a few months back, I’ve been using Google’s Chrome OS as my main development machine so a local, packaged app made sense as I didn’t need to setup a webserver. Further information on Chrome apps can be found at https://developer.chrome.com/apps/first_app.
The bare essential components to load a packaged app in Chrome requires a few simple steps, some basic files and a text editor of your choice. Firstly, the basic file requirements are:
manifest.json – A JSON formatted manifest file explicitly declaring permissions etc
background.js – A background Javascript file to run the app
index.html – The HTML file to dictating what the app displays
icon.png – At least one 16px X 16px icon image file required
Let’s get started to make our own package app by first installing Google Chrome and enabling Developer mode at chrome://extensions, following the steps below.
- Open Chrome and navigate to chrome://extensions and check the ‘Developer mode’ checkbox
Now create a folder or empty directory somewhere on your local drive, for my example, I’ll call this ‘tutorial-example-1’. Fire up your text editor, personally my favourite is Sublime, but it’s not available in a traditional method on Chrome OS, so I use either the default Chrome OS Text app or the Caret app, but any text editor will do such as, Notepad++ or even just plain old Windows Notepad. Hell, why not even use nano or vim if so inclined.
Copy the text and filenames below and create three separate files and download the icon images:
manifest.json – App manifest JSON file
{
“name”: “Hello World!”,
“description”: “My first Chrome App.”,
“version”: “0.1”,
“manifest_version”: 2,
“app”: {
“background”: {
“scripts”: [ “background.js” ]
}
},
“icons”: { “16”: “icon_16.png”, “128”: “icon_128.png” }
}
background.js – App background script Javascript file
chrome.app.runtime.onLaunched.addListener(function() {
chrome.app.window.create(‘window.html’, {
‘bounds’: {
‘width’: 400,
‘height’: 500
}
});
});
window.html – App window HTML file
<!DOCTYPE html>
<html>
<head></head>
<body>
<div>Hello, world!</div>
</body>
</html>
icon.png – App icon PNG images
![]() icon_16.png – (source)
icon_16.png – (source)
icon_128.png – (source)
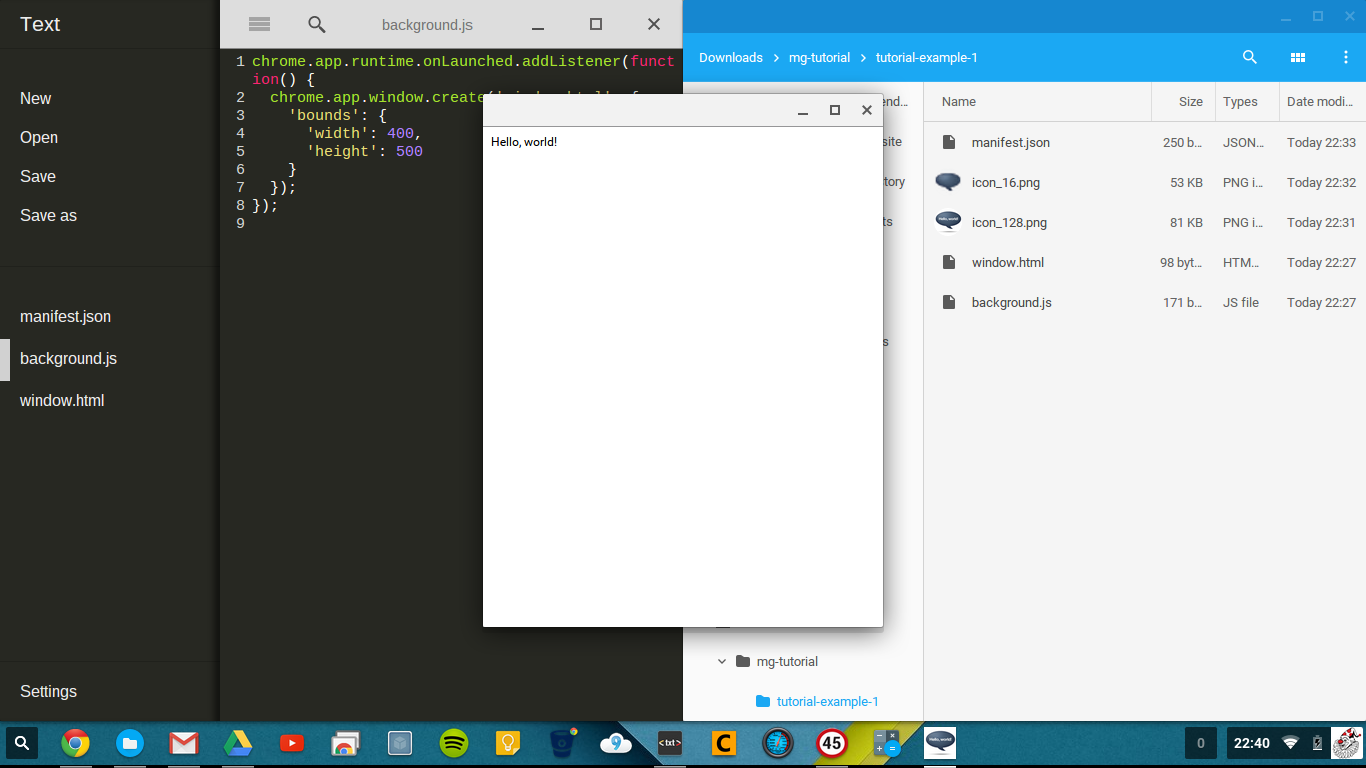
Cool, so we have all the files in out ‘tutorial-example-1’ folder (or whatever you named this directory) and we can now try to load the app in an unpackaged state and run it in it’s own window.
- Go to ‘chrome://extensions’ in Chrome
- Ensure the ‘Developer mode’ checkbox is checked
- Click ‘Load unpacked extension’ and select the folder you created earlier
- Once loaded, click ‘Launch’ in the apps listing (beware of manifest parsing errors)
There you have, a very basic Chrome app, albeit doesn’t really do anything apart from open and print ‘Hello world!.’ Let’s iterate on this example, to make it more input driven. Part 2 ==>


One thought on “HTML5 Tutorial Series”