TheMonolith HTML5 tutorial introduction
The tutorial topic is going to cover the creation of Google Apps script web app and a Chrome bookmarklet extension, which we’ll use to submit form data over the internet (via HTTP) to a remote endpoint/service, where this data will be processes server-side and put into data table. We’ll essentially be saving data to a web app database by clicking the extension icon and invoking some Javascript to get the current page’s URL and title (as well as selected text and other form data) and send it to a popup form; submitting this form saves the data to server.
The structure of a Chrome extension is a lot simpler than you think. They are just a collection with HTML and Javascript files and CSS for UI/styling. This makes making or developing extensions much more accessible for amateur developers.
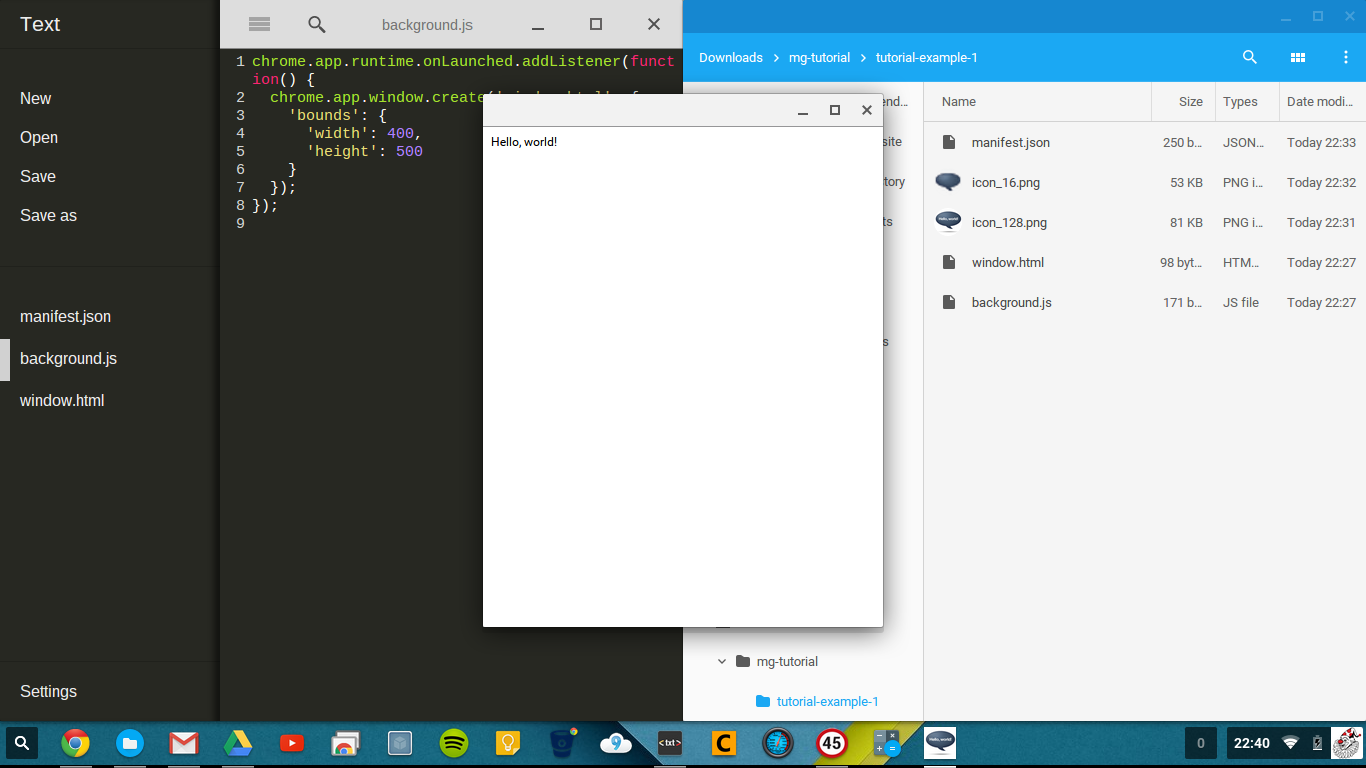
Right, so let’s get started. As always, a Chrome extension will require us to create some example files to load the extension so we can begin our local development. Go ahead and open up your text editor, create a new directory for the project and add the files:
manifest.json – (Github source)
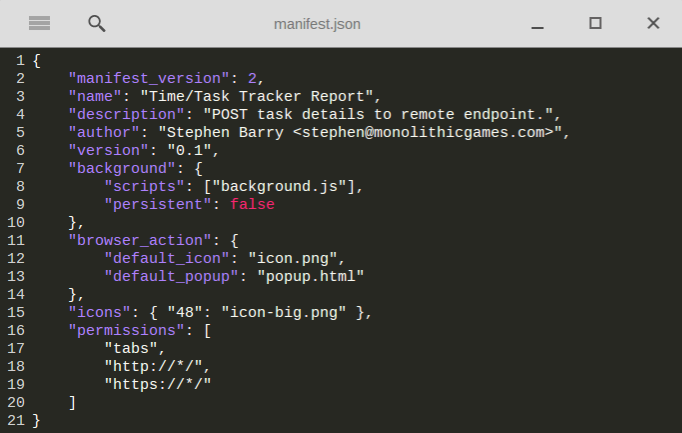
This is the glue that holds our extension together. It contains the basic meta data about the extension (title, description, icons etc), as well as acting as a pointer to the various files that contain the extension’s user interface and JavaScript code. It also defines permissions that specify which browser components and external URLs the extension is allowed to access. The manifest for our extension looks like this:
The background property points to a JavaScript file which contains the logic code for the extension (in this example, mine is called background.js). The browser_action section defines a button with an icon (here, icon.png), which the user will click to open the bookmarking dialog, and the popup property points to the file containing the dialog form HTML.
popup.html – (Github source)
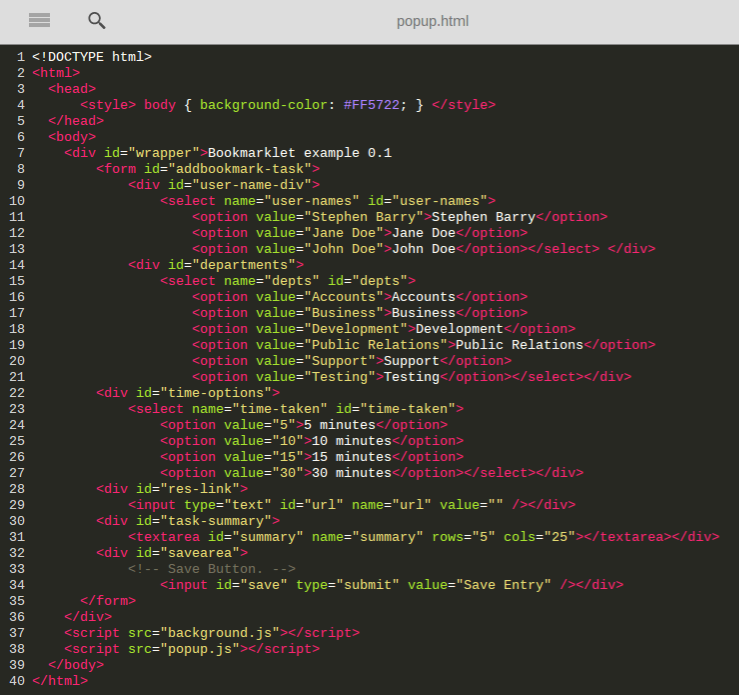
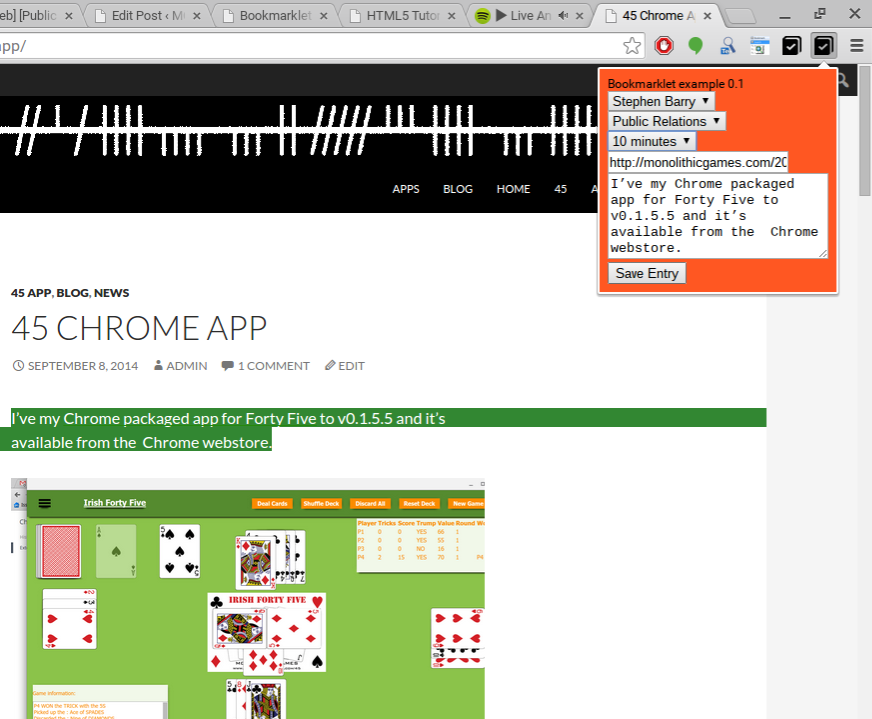
This file contains our UI: a basic HTML form with user-names, depts, time-taken, url and summary and fields (so that we can edit and organise our bookmark/data before saving it to the server-side).
popup.js – (Github source)
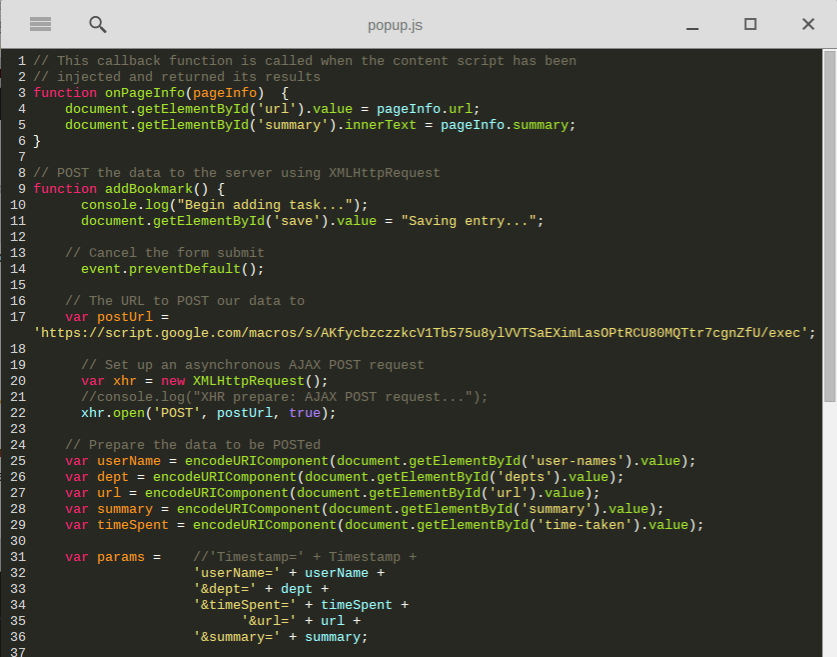
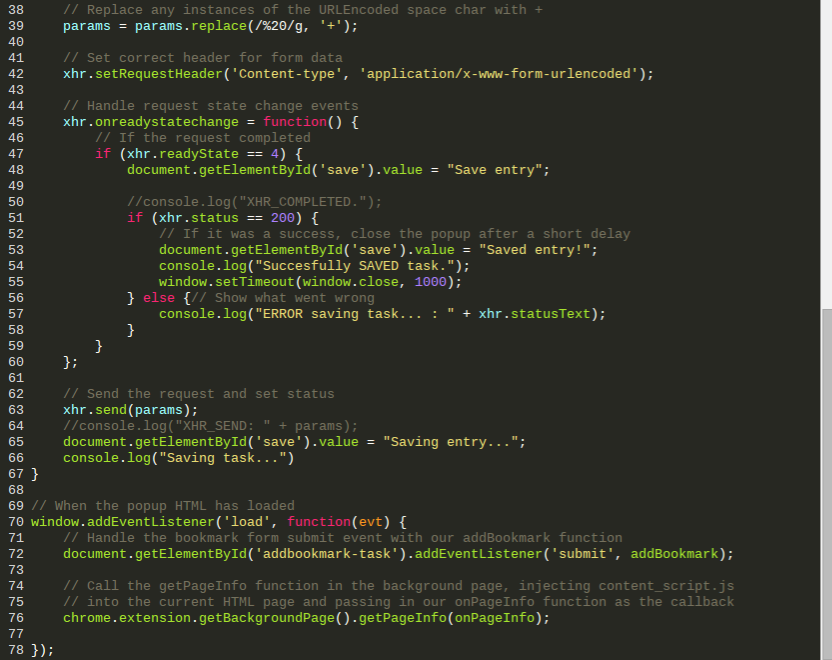
This file contains JavaScript code to populate and save field values.
background.js – (Github source)
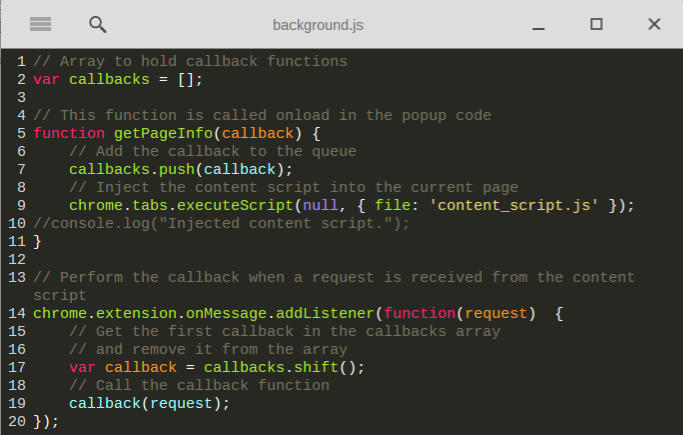
Think of this file as the negotiator between the popup dialog and the content/DOM of the currently loaded web page. getPageInfo is the function we called when our popup loaded, and its parameter is the callback function which sets the values of the form fields in popup.js.
When getPageInfo is called, it injects the content script (below) into the DOM of the current web page and executes it. It then sets up an event listener to listen for the onMessage event which will be triggered by the content script.
content_script.js – (Github source)
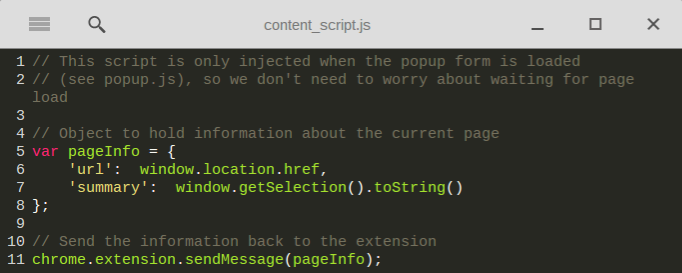
The content script itself is pretty simple: it just gets the url and any selected text (summary field) from the current page and passes them back to the event script by calling sendMessage, which triggers the onMessage event we’re listening for in background.js.
The event script listener then calls the callback function it was passed (which, if you remember, is the pageInfo function from the popup page), passing in the information about the page so that it can populate the form field values.
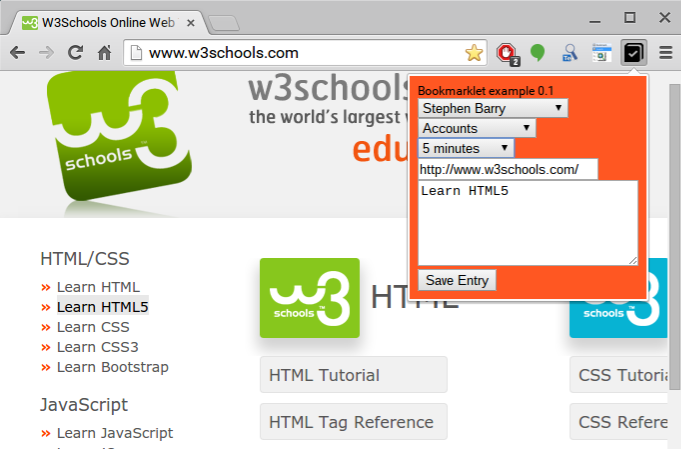
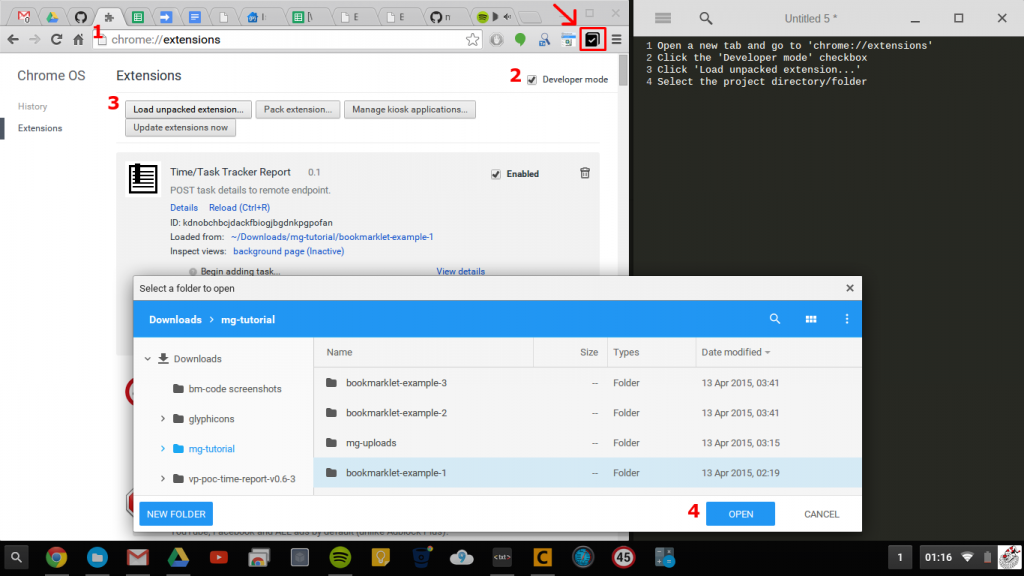
Now if we’ve done everything correctly, we should be able to load the extension from the ‘chrome://extensions‘ page. Click the ‘Developer mode‘ checkbox and then click ‘Load unpackaged extension‘ and select the folder containing our code and ‘Launch‘.
Et voliá, This doesn’t look so bad, albeit bland, basic and lacking any styling, and if you set some values and close/reopen the page you lose the selections 🙁
But, overall, I think we’ve a good base data structure and list of buckets to organise this data. Hmm, we’ll make to need some objects such as the username, department and task options persist and we’ll also try to hide the task options that don’t apply to us, as well as implementing some additional basic functionality. This extension could yet have some potential usefulness! Check out the sheet below to see it in action (I’ll explain the Sheet and Apps script backend next in part 2).
- Google Sheet – bookmarklet sheet example 1
- Bookmarklet Chrome extension example 0.1 source code Github
===> PART 2: Feedback and comments welcome!

